

Happy Tuesday Friends!
After a week of recovering from my surgery I a feeling pretty great! I have my first post op appointment tomorrow. We have had some beautiful weather lately here in Michigan. Sunshine most days and warmer than normal weather. It has been really hard to take it easy the last few days because sunshine and Spring always get me in the mood for projects around our house. I am so ready to have nice weather for walking and being outside too.

These monogram photo frames are an all time favorite project of mine! Having three kiddos they each get their own frame and this wall ends up being a feature wall in our living room due to the statement they make.
As with all projects I dive into, I prefer them to have a quick turn around… my favorite kind of projects are projects I can complete from start to finish in a day. These frames fall right in line with that for me.

Items needed:
1×10 board cut to 20 inches in length
8 x 10 photo frame
wood letter
e6000 glue
stain or brown paint
black paint
chalk paint for frame
D ring picture hangers

Steps:
1.) After purchasing your board cut it to the desired length. I usually take advantage of the service Lowes provides and have them cut my boards to the length I need
2.) Stain board… for all three of my boards I used brown paint watered down and applied it like I would stain. Throughout the winter and for my Let’s Create Events I quite often use this process of “staining” wood so that I don’t have to contend with the fumes of regular stain indoors. I have used this process many, many times with no complaints at all on how it turns out.
3.) Remove glass from frame and paint outer frame in your desired color
4.) Paint letter … once dry… sand edges
5.) Once all you pieces are dry begin to assemble by adding your hanging mechanism to the back side of the board. I most often use d-ring picture hangers for this type of project because I like knowing how secure the d-ring hangers are.
6.) Next measure to where you would like to place a nail for hanging your frame. Attach nail and hang photo frame
7.) Using E6000 glue attach your letter to the board
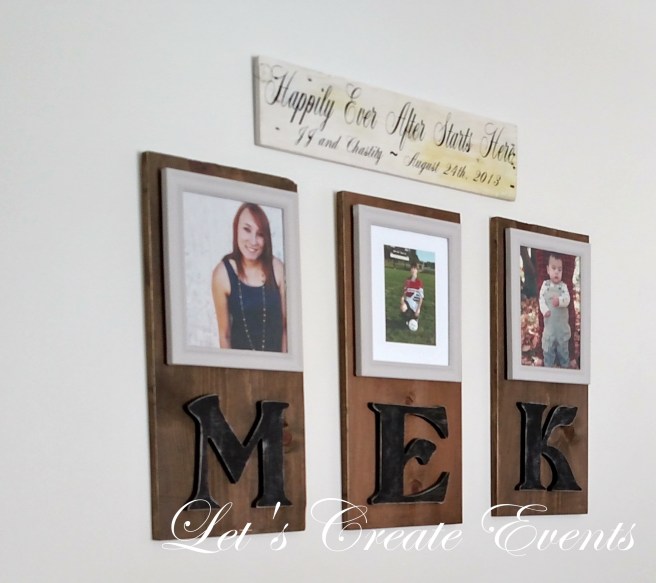
I love that I can take the frames off and switch out photos easily if I would like to.
I also have very light gray walls in our home. I love the warmth that the wood provides on the wall too.

What projects are you working on right now?
Thank you for stopping by!
I am sharing this post at…
DIY Show Off – A Stroll Thru Life – Home Stories A to Z – Savvy Southern Style
Colors and Craft – Tatertots & Jello – Pierced Pastimes – Practically Functional
Nifty Thrifty Things – Finding Silver Pennies – The Crafted Sparrow – Snap Creativity
Ginger Snap Crafts –Seeking Lavender Lane – Skip to My Lou – Dagmar’s Home
Making It In The Mountains – Joy In Our Home – Live Laugh Rowe – A Fresh Squeezed Life
Worthing Court – Design Dining Diapers – White House Crafts – Kingsbury Brook Farm
Redo It Yourself Inspirations – Small Home Soul – The SITS Girls – VMG206
One More Time – Denise Designed – The Crafting Nook – Little Farmstead
Rustic Refined – Sweet Parrish – Twelve on Main


Love this! Cool and unique was to display photos of those you hold dear. Thanks for sharing at #Snickerdoodle! Pinned to share
LikeLike
Such a good idea and they make each of your beautiful children feel special! Thank you for sharing it with us.
LikeLike
A great way to showcase your family photos. Fun and creative. Thanks for sharing at DI&DI.
LikeLike
That is a gorgeous idea! Pinning this and sharing it on G+ 🙂
LikeLike
Thank you!
LikeLike
Great idea. I love that you are able to easy change out the photos yet still have a cohesive look. And I’m with you – if it’s easy and inexpensive, it’s my kind of project! 😉
LikeLike